
24 Hour ServiceChoosing Trv Radiator Valves starts with understanding your radiator, heating system, and comfort needs. A thermostatic radiator valve adjusts hot-water flow as room temperature changes, helping prevent a sunny room from becoming uncomfortably warm. The right choice depends on practical details, not appearance alone. Check the valve connection, pipe size, and whether the pipe approaches from the floor or wall. Small details matter. You should also confirm that the valve suits your heating system and the radiator’s flow direction. Product specifications and manufacturer guidance are useful checks before buying.
Consider how each room is used. A bedroom may benefit from a lower temperature setting, while a frequently used living room may need steadier warmth. Standard and angled valve bodies suit different pipe layouts, and smart models can offer schedules or remote adjustments. Yet added features are not always necessary. A simpler model may be easier to operate and maintain. Keep the radiator clear of heavy curtains or furniture, which can affect temperature sensing and valve response. If you are unsure about compatibility, ask a qualified heating professional to inspect the connection before installation. Even careful research has limits: older systems can have unusual fittings or controls. This guide explains the key features, fit, and checks to help you choose with greater confidence.
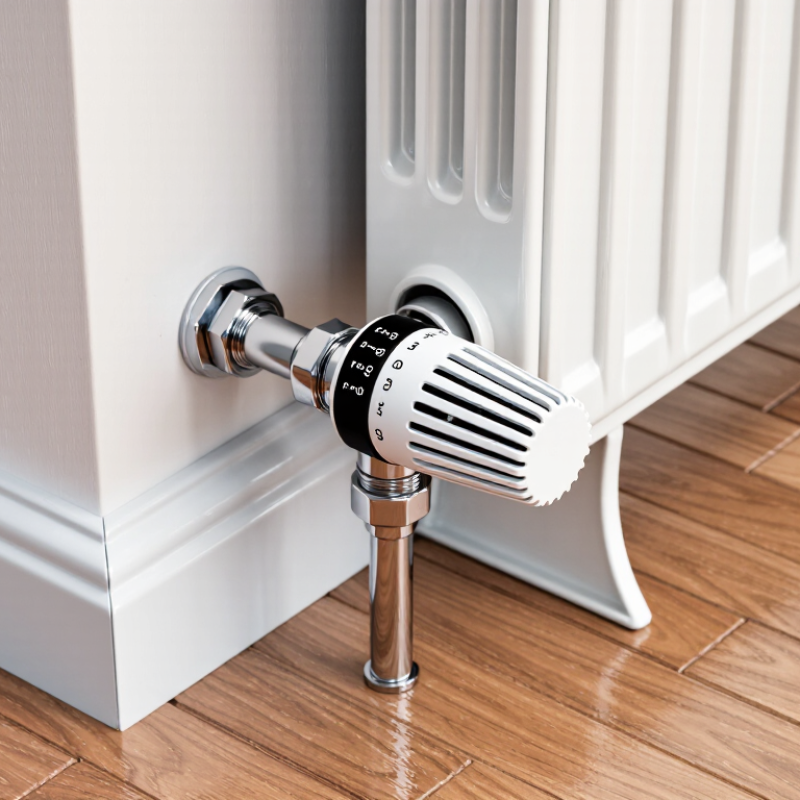
A thermostatic radiator valve (TRV) responds to the air temperature around its sensor. As the room warms, the sensor expands and presses a small pin inside the valve. This restricts hot water entering the radiator. When the room cools, the sensor contracts and allows more flow. Small changes matter. A TRV regulates one radiator; it does not directly set the boiler’s water temperature or guarantee an exact room temperature.
The numbered settings are guides, not precise degrees. Their effect depends on the valve, its location, and the room. It is easy to assume a higher setting heats a room faster, but it usually keeps the valve open longer instead. Keep the sensor clear of curtains and furniture, which can trap warm air and cause the radiator to shut down too soon. A cold radiator may be responding correctly if the room has reached its set point. If it stays cold in a cool room, check that the valve is not obstructed and consider asking a heating professional to inspect it. When choosing a TRV, check that its connection matches your radiator and pipework, and that its shape suits the installation. A good fit matters more than an impressive dial.
A thermostatic radiator valve (TRV) senses the room temperature and adjusts hot-water flow through the radiator. The dial sets a target temperature; it does not directly set radiator output.
Typical dial markings are approximate: a common scale is frost protection near 6°C, then about 12°C, 16°C, 20°C, 24°C, and 28°C for settings 1–5. Actual temperatures vary by valve, installation, and room conditions. Choose the setting that provides your desired room temperature.
A thermostatic radiator valve (TRV) must match both the radiator connection and the heating system. Check the existing valve’s thread size and connection type before ordering; fittings that look alike may not seal correctly. Note whether the pipe approaches from the floor or wall, and whether a straight or angled valve suits that route. Small details matter.
System design matters too. Confirm whether your heating system uses one pipe or two, and check the valve’s flow direction and pressure requirements against the manufacturer’s specifications. Some radiators need a compatible adapter, but an adapter cannot fix every mismatch. If you are unsure, compare the radiator and valve instructions or ask a qualified heating professional. I have learned that guessing from appearance alone can mean a second trip to the supplier.
Tips: Photograph the old valve and measure its connection before removal. Check the arrow on the valve body against the pipe’s flow direction. If the system type is unclear, pause and verify it; that extra check is worth doing.
Compare Valve Types, Features, and Installation Options
A thermostatic radiator valve (TRV) adjusts hot-water flow as room temperature changes. A manual valve only opens or closes the radiator, so it cannot maintain a set temperature automatically. TRVs suit rooms with changing heating needs, such as bedrooms that warm quickly in afternoon sun. Check whether your system uses one-pipe or two-pipe plumbing before choosing a valve. Compatibility matters.
Valve bodies come in angled, straight, and corner designs. Match the shape to where the pipe enters the radiator; a neat-looking valve can still be awkward if it blocks a walkway. Consider a remote sensor when curtains, radiator covers, or furniture could trap heat near the valve head. Some models also offer numbered settings or frost protection. Verify the valve’s connection size and flow direction against your existing pipework. Small details matter. Installation can involve draining part of the system, so get help if you are unsure.
Tips: Before buying, photograph the pipe connection and measure the available space. Keep the sensor exposed to room air, away from direct sunlight and drafts. After fitting, turn the heating on and check for leaks as the system warms. A setting that feels right in one room may need adjustment in another; room use and insulation vary.
Choose TRVs by how each room is used, not by radiator size alone. A sunny bedroom may need less heat than a north-facing study. In a living room, set the valve for comfortable evening use; in a spare room, choose a lower setting and check for damp or condensation. The U.S. Energy Information Administration’s 2020 Residential Energy Consumption Survey reported that space heating made up about 42% of household energy use. That figure is not a guaranteed saving from TRVs, but it shows why avoiding unnecessary room heating matters. A valve cannot fix poor insulation or a badly balanced system.
Observe rooms over several days. Place a small thermometer away from the radiator, curtains, and direct sunlight, then adjust the TRV gradually. Keep the valve unobstructed: a long curtain or sofa can trap warm air around its sensor and make the radiator shut off too soon. Bathrooms often need a warmer setting during use, while hallways usually need less. Still, household routines vary. A neat room-by-room plan may need revision after a cold morning.
Tips: Start around 18–21°C in occupied rooms, then adjust for comfort and health needs. Turn the valve down in unused rooms, but avoid letting them become persistently cold. Check the setting again after changing curtains or furniture. If one room stays cold while others overheat, investigate radiator balance or the heating system before simply turning every valve higher.
Check the valve body before choosing a TRV head. Thread size, connection type, and radiator layout must match; adapters are not universal. Look for EN 215 compliance, the European performance standard for thermostatic radiator valves. Keep the sensor clear of curtains and furniture, or it may read trapped air instead of the room. Small details matter.
Set the dial for how each room is used, then allow time for the temperature to settle. The U.S. Department of Energy says a 7–10°F setback for eight hours daily can save up to 10% on annual heating and cooling costs. That figure applies to thermostat setbacks, not guaranteed TRV savings. Not a guarantee. Use it as context, and avoid copying one setting across every room.
Check the valve before each heating season. Turn the head gently and watch whether the radiator responds; a stuck pin can leave it cold or overheated. If the room warms unevenly, check for trapped air and follow the boiler instructions before bleeding the radiator. Inspect the valve area for dampness, too. A small leak is easy to miss. If the connection needs loosening or the valve keeps sticking, ask a qualified heating professional rather than forcing it. One detail I would revisit: a dial number is only a guide, not a precise room-temperature reading.
| Check | What to Verify | Practical Guidance |
|---|---|---|
| Valve and radiator connection | Confirm the valve-body connection matches the radiator and the existing pipework. | Measure or identify the connection before buying. Pipe sizes and radiator connections vary; a commonly encountered pipe size is 15 mm, but it is not universal. Use a suitable adapter only when the valve manufacturer specifies one. |
| TRV head compatibility | Check that the thermostatic head fits the valve body, including its connection type and dimensions. | Heads and valve bodies are not all interchangeable. If replacing only the head, verify the exact fitting requirements and whether an adapter is approved for that combination. |
| Valve orientation and flow | Check the valve’s permitted installation position and any direction-of-flow marking. | Some valve bodies are directional or have specific installation requirements. Follow the product instructions and the arrow, if present; do not assume every valve can be fitted in either direction. |
| Heating-system suitability | Confirm that the valve type is suitable for the system layout and operating conditions. | Two-pipe and one-pipe systems can require different valve arrangements. In a one-pipe system, the correct bypass arrangement is especially important. Ask a qualified heating professional if the system type is uncertain. |
| Temperature settings | Understand the numbered scale and the room temperature the setting is intended to maintain. | Settings are generally a control scale, not an exact temperature display. The numbers-to-temperature relationship varies by model and room conditions; consult the valve’s instructions and adjust gradually to find a comfortable setting. |
| Room and radiator location | Check whether the sensor head can sense room air freely. | Curtains, radiator covers, furniture, or direct heat can affect temperature sensing. Keep the head unobstructed. If it must sit behind a cover or in a confined space, check whether a remote-sensor option is suitable. |
| Routine maintenance | Check the valve’s movement and the radiator’s response during normal seasonal use. | Follow the product instructions. If the head is removable, exercising the valve pin gently when appropriate may help prevent sticking. Do not force or pull the pin; seek professional help if it is stuck or leaking. |
| Replacement and safety | Determine whether replacing the valve body requires draining or isolating part of the heating system. | Replacing a valve body can release hot, pressurised water and may require draining and refilling the system. Use a qualified installer if you are unsure how to isolate the system or safely complete the work. |